What to Do When You Lose Android Data: The Ultimate Guide
Learn the fundamental procedures and professional advice for recovering lost data on your Android device. This thorough guide will help you through data recovery to get your priceless information back quickly, whether it be images, contacts, messages, or files.
With over 2.5 billion Android smartphone users globally, these gadgets have mostly taken over our life. Around 70.94% of all smartphones run the popular Android operating system. The data stored on Android phones is significant since so many people use them. This includes things like priceless memories and crucial data.
In this case, having a trustworthy Android data recovery tool is crucial. If you mistakenly remove data, your phone stops functioning properly, updates ruin your phone, you wipe your phone clean without making a backup, or even if your phone’s hardware malfunctions, these programmes can help you recover your lost information.
This comprehensive article tries to offer complete solutions and instructions for what to do if you lose data on your Android device.
Part 1: Data Loss Preparation
Regularly backing up your data is the greatest approach to prevent data loss. The two major ways to back up your Android data are through Google Account backups and third-party backup programmes.
Backups for Google accounts:
If you use Google services like Gmail, Google Drive, and Google Photos, Google Account backups are an easy method to safeguard your data.
Your contacts, calendar events, app data, and device settings are often included in these backups. How to utilise Google Account backups
To activate automatic backups to your Google Account on Android devices, navigate to “Settings” > “System” > “Backup”.
Installing the Google Drive app on your iOS device and turning on backups will allow you to backup your Google data.
Alternative Backup Options:
Additional backup options for different devices and data kinds are provided by third-party backup solutions.
These remedies could be cloud-based services from companies like iCloud (for Apple devices), Dropbox, or Microsoft OneDrive, or they could be specialised backup software. Using third-party backup services
Pick a trustworthy supplier, then adhere to their setup instructions.
Make sure the devices and data your selected solution can secure.
To guarantee that your data is regularly backed up, set up automated backups.
Third-party solutions frequently provide adaptability, cross-platform support, and the capacity to backup data including files, pictures, and videos.
In order to choose the best option for you, evaluate your needs.
Automated Backup Configuration:
Your data is consistently safeguarded without human intervention thanks to automated backups. To set up automated backups, follow these steps:
Decide which files, such as pictures, documents, or system settings, you wish to backup.
Pick the best backup strategy, such as third-party backup software or Google Account backups.
Set up your backups to run every so often, like once a day or once a week.
Make sure your devices are online and enable automatic backup on them.
The significance of routine data synchronisation
Your data will be consistent across all of your devices and backup locations thanks to data synchronisation. For a number of reasons, synchronisation must be kept:
Accessibility: With the right permissions, synced data may be accessed from any device, increasing flexibility and convenience.
Data integrity: When many devices access the same data, synchronisation helps prevent errors and conflicts.
Disaster recovery: Synchronised data on other devices or backups is unaffected if one device or backup site fails.
To keep the data synchronised:
Use automated synchronization-capable cloud storage services.
In apps and services that offer them, turn on the synchronisation functionality.
To ensure data consistency, periodically verify the synchronisation status.
Part 2: Actions to Take Right Away
Here are certain actions you ought to take right away before trying to recover Android data.
Keep your cool and evaluate the situation:
Maintaining composure is crucial in situations where data is lost or inaccessible. Hasty decisions made in a state of panic could make the issue worse.
Breathe deeply and move forward with a methodical strategy to deal with the problem successfully.
Verify Any Temporarily Inaccessible Data:
The following methods work for doing this:
Restarting the Device: If your data suddenly becomes inaccessible, a straightforward device restart can fix the problem.
Temporary difficulties that can be obstructing access to data can be resolved by restarting the device.
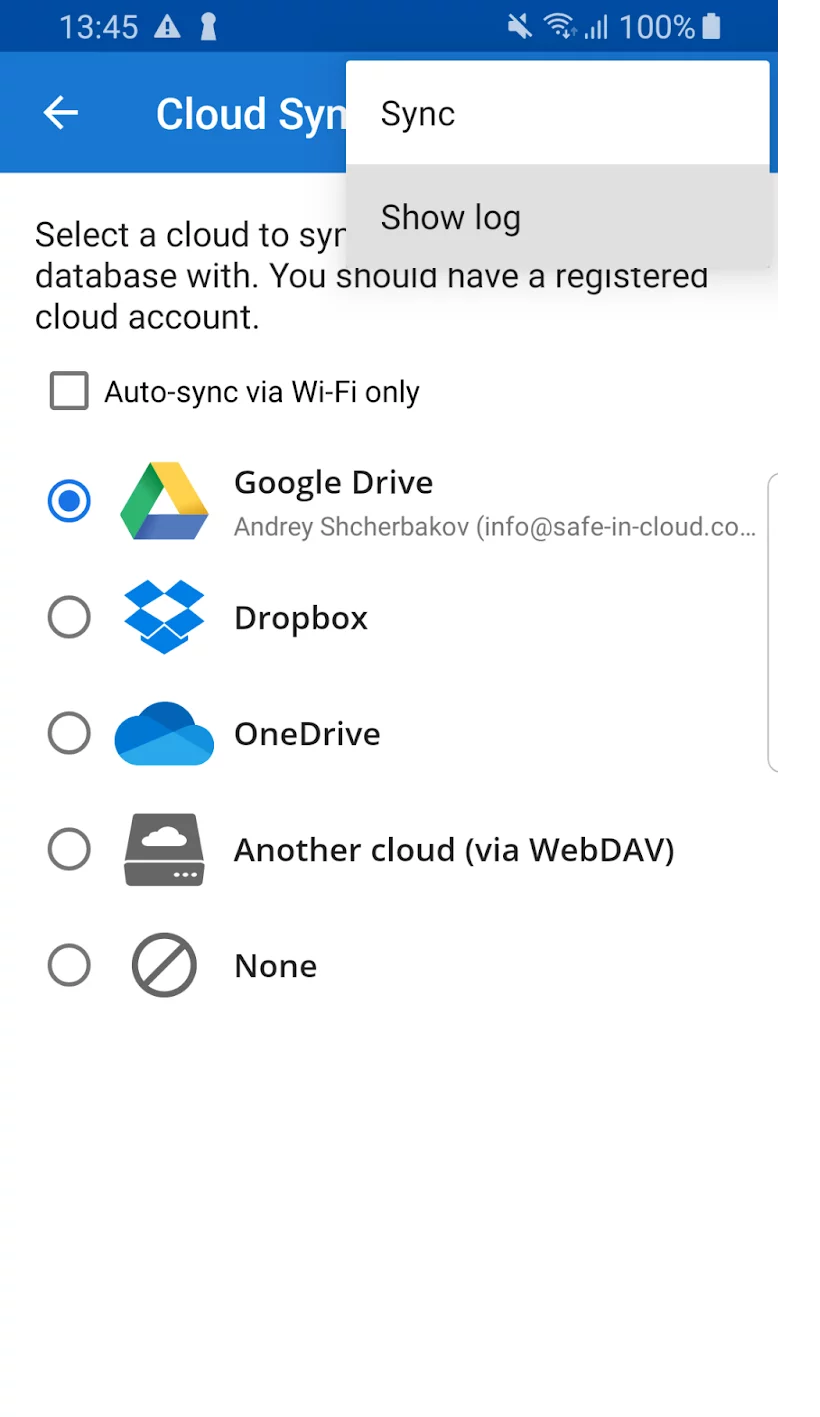
Verifying the Status of Your Cloud Account or Service If You Rely on Cloud Storage or Synchronisation Services, Do This. To verify the status of cloud synchronisation:
Launch the device’s cloud storage or synchronisation app.
Check to see if you are online and logged in.
Check to see if your data or files are current and synchronised correctly.
Finding the Amount of Data Lost:
After ruling out transient problems, determine the degree of data loss. Identify which particular data or files are impacted and which are unaffected.
You will gain a better understanding of the severity of the situation and the essential steps thanks to this assessment.
Avoiding Activities That Might Make the Problem Worse:
It is essential to refrain from taking any activities that can make the data loss scenario worse.
Avoid dangerous recovery techniques unless you are an expert in Android file recovery. These techniques could result in more data loss. Professional data recovery services could be required in some circumstances.
Don’t try to open or fix hardware yourself if data loss is caused by a physical problem with a storage device. To stop additional harm, seek professional help.
Avoid installing unneeded software:
Using unfamiliar tools or installing new software can obstruct data recovery efforts. If you try data recovery alone, only utilise reliable recovery tools that are well-documented.
Section 3. Data Recovery Techniques
There are numerous strategies and methods for recovering Android data, some of which are listed below:
A. Making use of local backups
Getting back data from the manufacturer’s backup service:
You can retrieve your data with the help of the backup services that many manufacturers provide. An overview of how to restore data from a manufacturer’s backup service is provided below:
Go to the settings on your smartphone.
The “Backup and Reset” or equivalent options should be found. The “System” or “Accounts” settings may have this option.
On the menu, select “Backup” or “Backup and Restore.”
A manufacturer’s backup service should be chosen.
Log in with your account information.
Decide which backup you want to restore from.
To start the restore procedure, adhere to the on-screen directions.
Using the built-in backup and restore feature on Android:
You can backup and restore many parts of your Android device using the built-in backup and restore tool. This is how to apply it:
Open the settings of your smartphone.
Depending on your Android version, scroll down and hit “System” or “Accounts”.
Decide whether to “Backup” or “Backup and Restore.”
Make sure “Back up my data” is turned on. Your app data, Wi-Fi passwords, and settings will be automatically backed up to your Google account.
Restore your data on a fresh or factory-reset device by following the on-screen instructions during the first setup procedure. You’ll be given the option to restore data from an earlier backup.
B. Restoring Google Drive
Restoring App Settings and Data:
App settings and data can be backed up to Google Drive. Follow these steps to recover this data:
Make sure the internet is accessible on your device.
Launch the Google Drive programme.
To access the sidebar, tap the three horizontal lines in the top-left corner.
“Backups” will be displayed in the sidebar menu.
Select the backup that includes the settings and data for the apps you wish to restore.
Then, adhere to the on-screen directions by clicking the “Restore” button.
Multimedia File Recovery:
While Google Drive largely concentrates on app data and settings, Google images is frequently used to backup multimedia files (such as images and videos).
Here’s how to get your hands on Google Photos’ multimedia files:
Launch the Google Photos programme.
To access the sidebar, tap the three horizontal lines in the top-left corner.
Choose either “Trash” or “Bin.”
Choose the multimedia files you want to restore, then select “Restore” from the menu. By doing this, the files will be returned to your primary Google Photos library.
C. Apps for third-party data recovery
It’s critical to conduct research and select a reputable and trustworthy alternative when thinking about third-party Android data recovery apps. Dr.Fone is the top data recovery app for iPhone and Android, and it has become well-known for its unrivalled data recovery powers.
The following guidelines will assist you in your quest for a reliable app:
Visit the app store on your device to see reviews and ratings. Look for applications that have gotten good feedback from users and high ratings.
Online research: Look for critiques and suggestions on tech blogs and forums. Look for professional advice and user reviews of the app you’re thinking about.
Make sure your chosen app respects your data privacy by taking this into account. To see how your recovered data will be handled and whether it will be properly protected, read their privacy policy.
How to Effectively Use Data Recovery Apps
Here are some general guidelines for using credible data recovery tools, like Dr.Fone, once you’ve chosen one:
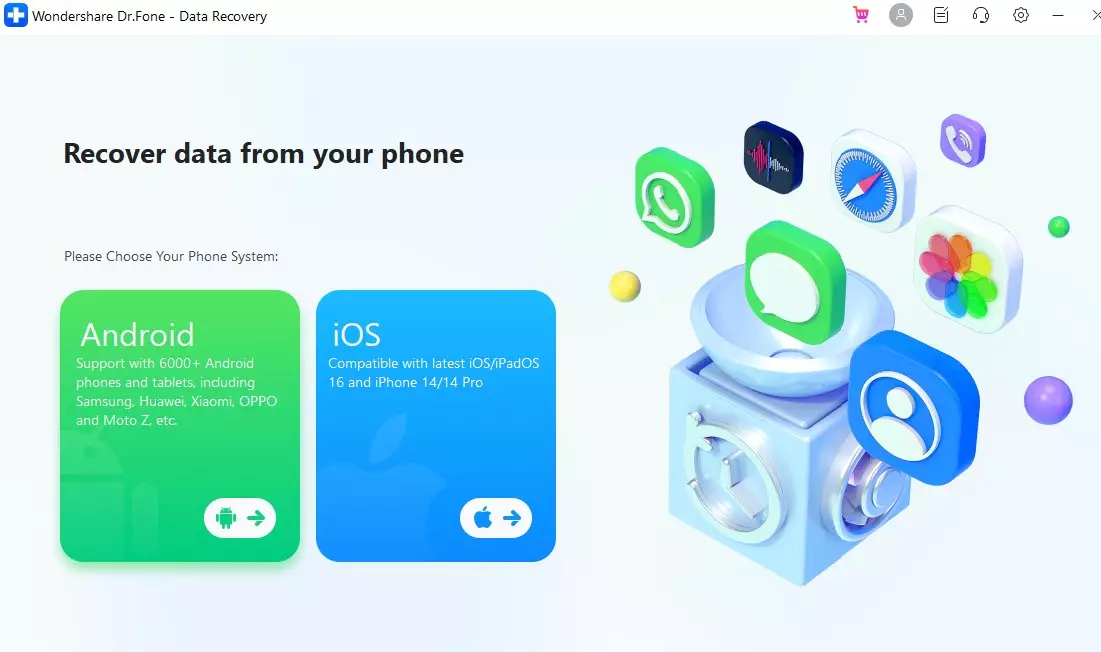
Step 1: Open Wondershare Dr.Fone on your PC, then select Data Recovery from the Toolbox menu.
Step 2: Choose “Android” as the type of device.
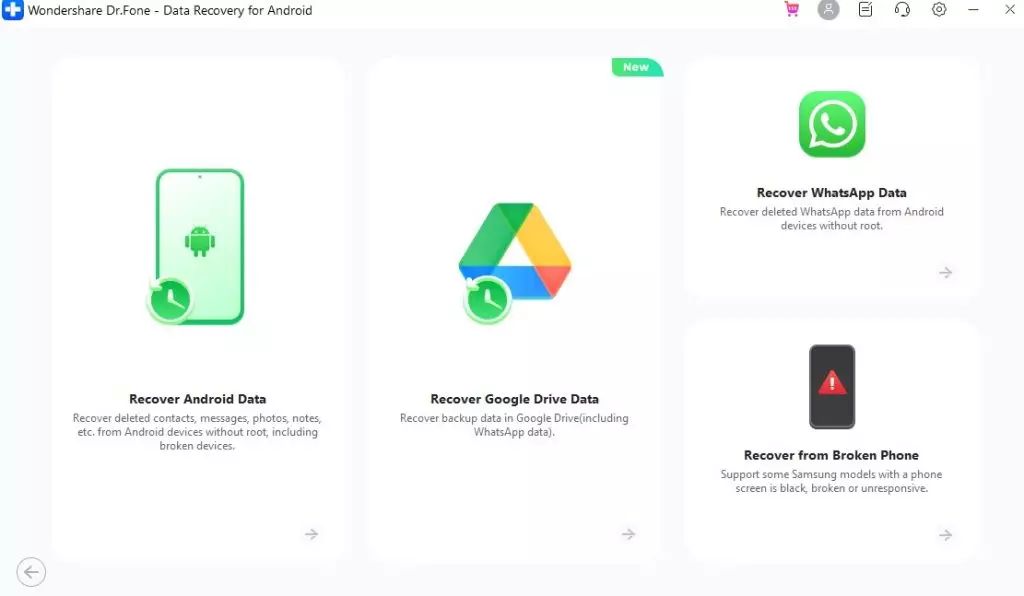
Step 3: Choose “Recover Android Data“ from the available options.
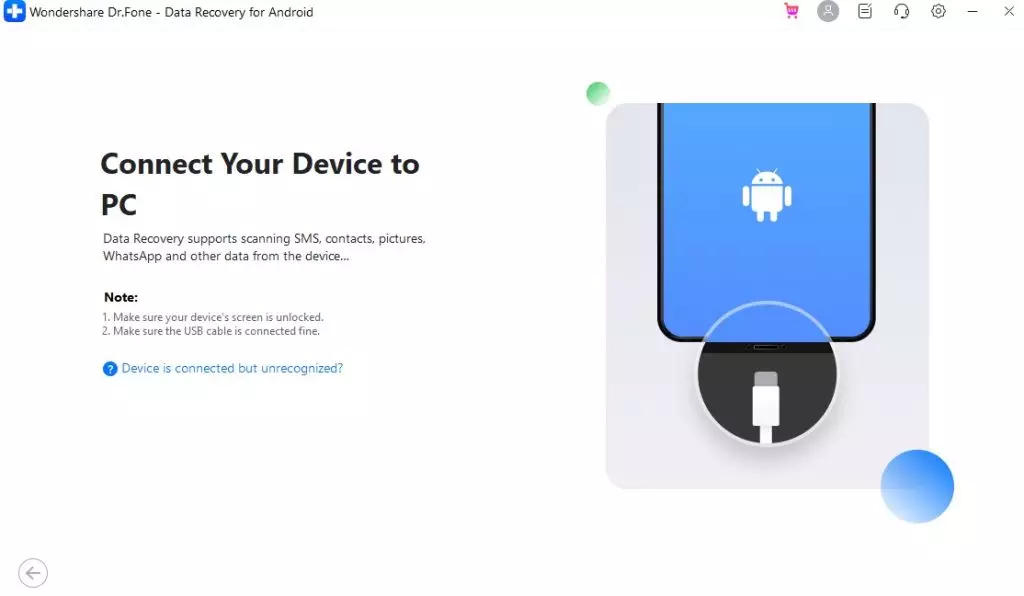
Step 4: Attach your Android device to your PC using a cable and wait for it to be detected.
Step 5: Choose the file types you want to retrieve from your Android device and click “Start Scan.”
Step 6: Wait for the platform to scan and display the recovered data on the preview screen.
Step 7: Browse and select the data you want to retrieve, then click “Recover” and choose the recovery location. Confirm the recovery process when prompted.
Part 4. Contacting Professionals
A. When to Seek Professional Assistance:
When it comes to data loss, knowing when to seek professional assistance is crucial. While DIY methods can sometimes work for minor issues, there are certain situations where the expertise of a professional data recovery service is necessary:
Physical Damage:
If your storage device has suffered some physical damage, such as a broken hard drive or flash drive, attempting recovery yourself can worsen the problem. Seek professional help immediately.
Unrecognized or Inaccessible Data:
When your device can’t recognize or access your data, it could be a sign of a more complex issue that requires professional tools and skills to recover.
Deleted or Overwritten Files:
If important files have been deleted or overwritten, it’s essential not to use the device further to prevent data overwriting. Professionals can employ specialized techniques to recover lost data.
Corrupted or Formatted Storage:
Data corruption or accidental formatting can render your files inaccessible. Professionals have the tools to handle these situations effectively.
B. Data Recovery Services and Considerations
Here are some pros and cons of professional services.
Pros:
- Expertise: Data recovery professionals have specialized knowledge and tools to get back the data from various storage devices and scenarios.
- High Success Rate: They often achieve a higher success.
- Data Integrity: Professionals can ensure data integrity during the recovery process.
- Time-Efficient: They can recover data more quickly, minimizing downtime.
Cons:
- No Guarantee: While professionals have a high success rate, there’s no guarantee of 100% data recovery in all cases.
- Security: Inquire about data security measures and confidentiality policies.
- Cost: Request a transparent cost estimate before proceeding with the recovery.
Conclusion
In this comprehensive guide to Android data recovery, we’ve covered essential data loss prevention and recovery aspects.
Key takeaways include the importance of regular backups, understanding data recovery methods, and knowing when to seek professional assistance. Preparedness is the key to avoiding data loss. Regularly back up your data, implement data protection practices and educate yourself and your organization about data recovery options.
Data loss can happen to anyone, and sharing this guide with friends, family, and colleagues can help them protect their valuable data and make informed decisions when faced with data loss. Together, we can reduce the impact of data loss incidents and ensure the safety of our digital information.